Wednesday, May 30, 2012

polaroid mini book

source: ugmonk
yes. i know.
this sickness has been very long lasting.
i ended up with bronchitis, my lungs are still working on healing.
i've been best friends with my bed, my inhaler, mucinex, & watermelon for the past weekish.
and i am feeling much better.

hubby and i had our 2 year anniversary on monday.
i love my baby... it was so great to spend the day with him.
so in honor of us & love, 
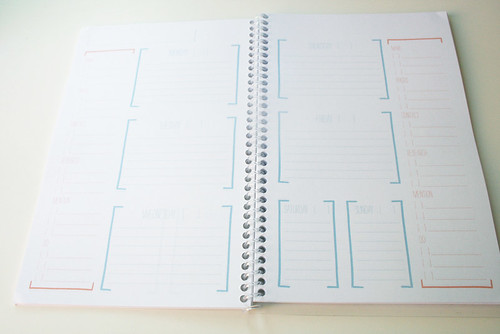
i am going to share with you a book i made a little bit ago.

back in february, hubby & i took a little trip to idaho for a valentine's getaway.
we found a sa-weet polaroid camera with film for $10!
so i made a book of the photos we took.

the best thing about this book is i made in 20 minutes or so 
in my husbands dental lab office while he was finishing crowns.
i had paper, some embellishments, scissors...
and the best part super glue!!
my glue runner had ran right out and the only glue on hand at the dental lab was super glue.
nice, eh?
okay. 
check it out.


i'm so lucky to have a such a sweet boy to be married to!
we broke out the polaroid again on our anniversary,
i have a fun plan for the pictures..
can't wait to show you all!!

back to preschool for me today.
wish me luck with these kiddos after a LOONGG weekend
:)


Tuesday, May 22, 2012

some awesome blog resources

a couple days ago i re-designed my blog 
i've learned so much with my blog (i still have SO much to learn) 
but i thought i'd share some resources i use a lot when blogging.
great places for graphics:

font sites:

some super sweet blogging tutorials:

blog planners:


planner2


i hope those are helpful! i need to get on the blog planning stuff, 
i could really use some organization in that area.
have a lovely day!

Monday, May 21, 2012

21 free social media icon sets

if you haven't noticed, 
i changed my blog design (again)
i really love doing it, and i learn SO much more each time i re-design a blog.

so over the next couple of days
 i thought it would be fun to share some blog design/layout/coding tips, awesome resources, etc.
here is todays:


i was looking to design some social media icons, 
but honestly i found SOO many FREE social media icon sets already out there that i figured
why re-invent the wheel?
so today's blog tip is a list of TONS of social media icon sets.
MOST of them include pinterest (finally!)
and A LOT of them include google + and instagram!
so browse around and spread some social media love!
if you use the sets, 
please be sure to let the designer know...
designers love to see their work in action, even if (and especially) if it was a freebie!

number 1:

number 2:

number 3:

number 4:
Subtle Grunge Minimal Vector Iconset

number 5:
Free hand embroidered social icon set by Pathtoodd.com

number 6:

number 7:
WP7 Icons in 40 New and Free Icon Sets

number 8:

number 9:
Freebies: Black & White Minimal Social Icons Pack

numbers 10, 11, 12, 13 & 14:


number 15:

number 16:
Vintage Social Media Stamps: Icon Pack

number 17:


number 18:
number 19:

number 20:

number 21:

the above set is the one i used for my design.
i love the simplicity and the amount of icons!!
so great.
thank you for all you wonderful people who share your talents with us virtually!

hope you all have an excellent day!
{love} lauryn 


Wednesday, May 16, 2012

color trends i'm loving

i have been totally crushing on a couple of color (and pattern) combos lately.
i played around on polyvore
(which i absolutely love. it's like dress up for grown ups)
and came up with a collection for each color trend i love.

the first is mint green & french pink:
 the second is the combination of 
floral patterns & black and white stripes:


i took a screen shot of my sets so i could have all the smaller images combined into one image.
you can see both sets on the polyvore website here & here.
the benefit of looking on the polyvore website is you will be able to see
where each item is sold or the source of the various images.

what do you think about these trends? 
seen anything great with them lately?

happy thursday!

Tuesday, May 15, 2012

i love you because printable

i have been seeing a lot of 
"i love you because..." prints around:

kiki creates
...and spiritually speaking

i love the idea.
for those of you who have not seen these beauties roaming around,
the idea is you put the "i love you because..." print in a frame
and use a dry erase marker to continually change your message.
isn't that so sweet!

the second i saw this, i was pretty anxious to make one for myself.
when i was messing with the design,
i came up with two completely different looks, but liked them both!
so today i am sharing the two "i love you because..." prints for FREE download!
it is not required, but if you do use this printable, please spread the love.
pin it, tweet it, like it...
and best of all,
become a follower of the blog if you are not already.

to download the file right or double click on the images below & click save as

muted nautical:

stripes and roses:

please let me know if you have any troubles with the download
& i will happily email you the printable of your choice.

thanks so much, have a lovely day...
and don't forget to tell your loved ones WHY you love them!!


Thursday, May 10, 2012

spread the love #8 + harem royal giveaway

spread the love is back!
with an awesome giveaway to join.
[scroll down for the party]
a little bit ago i was contacted by this one of a kind shop to do a giveaway:
this is the most unique jewelry you will ever come across..
(i almost guarantee it!)
and it is beautiful. i am so amazed at the individuality of each of the pieces.
and you know the first thing i thought when i saw the shop?
HUNGER GAMES!
the design of the jewelry totally fits the hunger games hype.
here are my favorite pics from the shop:
Long Dangle Butterfly Earrings - Steampunk Fairy Jewelry - 24K Gold Plated - With Real Butterflies Wings and Porcupine QuillsStatement Necklace Blade Wing - Neo Victorian Gothic Jewelry - 24K Gold Plated - Antiqued Copper Filigrees and Freshwater PearlBrutal Blade Wing - Gothic Jewelry - Fatal Necklace - Gold Plated - Antiqued Copper Filigrees and Industrial Screw - Free Shipping

now you have a chance to win ONE of the two pieces below:
option 1:
option 2:

Rose Gold Pendant  - Free Shipping - 24K Gold Plated - Antiqued Copper Filigrees and Industrial Brass Screws
enter below:


a Rafflecopter giveaway
now lets party.
spread the love is a weekend wrap up party.
share with us ANYTHING you have been 
working on, crushing on, making, baking etc. this week.
this party has NO RULES.
rules are too hard for me.
if you want to link up a URL, feel free!

however, 
i would REALLY REALLY love it if you follow my blog in some manner.
check out ways to follow in the sidebar.
if you like the party, add a button or a link somewhere to your blog!
not required, just nice to do...help spread the love!


love notes by lauryn

the party will last from friday morning to monday morning each week.
now, have fun and have a great weekend!


license plate love tutorial

good morning all! and happy thursday.
today i am sharing with you a license plate home decor item.
i'm really excited about it. 
i have been saving this tutorial for awhile waiting til finals were over so i could cover all the details.

with the hubby and i moving from utah to idaho and back to utah
PLUS buying a new car in the mix, 
we had a LOT of license plates. i thought i really needed to put them to use.
so, a while ago, i went to my pop's house with an idea in mind that he helped me create.
here is the finished product:

it really was so simple to make.
& with the help of dad i was able to get it done super quickly.

you will need some old license plates.
don't be afraid to mix numbers in for letters or turn a W upside down to make an M.
i used a number 1 to make an "L" and a 3 upside down to make an "E"
turned out pretty cute!
you will also need tin snips or a sharp box knife
a drill & drill bits
as well as a hammer & small nails
a metal file for safe measure,
and a piece of wood to be the backer.

first step: cut out your letters.

here's a tip: i do NOT recommend using the tin snips.
and here's why:
the edges are much more crisp and clean when using the box cutter 
because you can use a 'snap' technique.

with the tin snips, the edges become slightly jaggedy:

so i recommend you use a ruler to draw a straight line,

follow the line with a box cutter to score the plate,

then bend at the scored piece back and forth 

until the piece is ready to snap off.
you will get a crisp, clean edge.

use the metal file to smooth any jagged edges.
please oh please wear gloves for this part. :)

i also rounded my edges for safety & for looks:

when you have finished every piece, 
align them on your backing how you would like.
you may want to mark the places of the letters on the wood with a pencil.
i used an AWESOME piece of barn wood my dad had in the garage.

drill small holes in each corner of the letters

add the nails to each corner

and hammer in

do this to each of the letters and you're finished!

what do you think?
i still have extra license plates and need some ideas to use them.
any cute ways to recycle license plates?
let me know in the comments section!
{love} lauryn
Related Posts Plugin for WordPress, Blogger...

Design by | SweetElectric