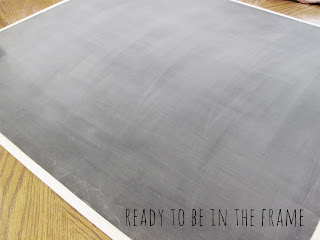
so today's post is kind of a tutorial within a tutorial. i am showing you my most recent project:
a magnetic chalkboard
while also giving detailed instructions of how to effectively use chalkboard paint.
so let's begin!
you will need a piece of sheet metal & chalkboard paint.
super great tip #1: buy sheet metal at a home improvement store like lowe's or home depot.
you can find sheet metal in the air circulation & ventilation aisle for around $9.
yes! a steal.
super great tip #2: sometimes it is easier just to buy things. i thought about making homemade chalkboard paint, but by the time i bought all the supplies, i would be spending about the same amount or more money than the real stuff.
the paint i bought costed me about $2 at hobby lobby. it was listed at $3.99 and i used a 40% off coupon. saved myself some time & probably money too.
(the edges are taped for safety. they can get sharp, so BE CAREFUL!)
now here's for the tutorial within the tutorial
to apply the chalkboard paint effectively follow these steps:
1. apply a think coat of paint all going same direction (say you choose vertically). let the coat dry completely.
2. when the coat is completely dry, apply another thick coat, this time going the opposite direction (now you would go horizontal). let the coat dry completely.
3. apply the third and last coat of paint going the same direction as you started (vertically). you will have all areas covered.
4. after the third coat has dried, let the chalkboard paint sit for 24 hours untouched. i know. it is so tempting to draw on that beautiful surface. but don't do it! after 24 hours has passed, cure the chalkboard surface. this is done by rubbing chalk across the whole board trying to cover all areas completely.
5. erase the chalk you used to cure, this sort of creates a chalk mess.
and you are done with your chalkboard painting!
to finish the magnetic chalkboard here's what i did.
i used an old frame we had from an outdated sailboat picture.
i am sure you could find one at a thrift store easy.
i removed the picture and used the mat as a back for my sheet metal.
with E600 glue, i glued the sheet metal to the mat from the picture.
it would have been nicer to use the cardboard backing, but my sheet metal was too small for my frame, so i wanted the white to show through rather than cardboard.
i added lace with a hot glue gun around the edges of the board.
then secured it all in the frame:
here it is in our basement with all the stuff on it and bad lighting unfortunately.
i love the fact that this board is magnetic & a chalkboard as well.
have a great thursday,
come back tomorrow for a ladyhue giveaway!!
yaay!


this is adorable! and i totally think i could do it (which is saying something). i love the idea of having something like this - i think i like the chalk board look better than a white board but idk if i could handle writing with chalk all the time -we'll see :)
ReplyDeletethanks for sharing!
oh and im excited to be your newest follower :)
-elisabeth
This is so awesome! I'm definitely going to have to do this.
ReplyDeleteLOVE LOVE LOVE this!!!!! Sucha great idea...and the frame and lace...swoon worthy. Great job!
ReplyDeleteI agree on making everything, some things are just easier to buy, after all you are making a beautiful DIY chalkboard already. Great tutorial, thank you for sharing, you are fabulous as always :)
ReplyDeleteTanya
you are so awesome and artsy my friend!! I love the touch of the ruffles that line the border of the chalkboard. Super duper cutie patootie!
ReplyDeleteThis is awesome girl! I need one of these for my office. Thanks for the tip on where to get the metal.
ReplyDeleteWow - you get the clever crafter award! I have made a million chalkboard things, but I have never thought to paint sheet metal! And the LACE! What!
ReplyDeletePinning right now...
I would have never thought to add a lace border. It is so cute, I may just have to add it my bulletin board!
ReplyDeleteThis is Awesome! Thanks so much for stopping by Creative Thursday last week. I couldn’t do these parties without you. Can’t wait to see what you link up this week. Have a great weekend.
ReplyDeleteMichelle
I loved this post
ReplyDeletehttp://www.inquitech.com/